If you’re new to the world of Instant Pot cooking, you might feel overwhelmed by the many features and functions of this versatile appliance. Don’t worry, you’re not alone. Many people have questions and doubts about how to use the Instant Pot effectively and safely. That’s why I created this quick guide for beginners, to help you get started with your Instant Pot and enjoy the benefits of fast, easy, and delicious cooking.
You’ll learn the basics of how to use the Instant Pot, from setting it up to cleaning it. You’ll also discover how to use the different settings and modes, such as pressure cooking, sautéing, and smart presets. You’ll also find answers to some of the most common questions and problems that beginners face, as well as tips and tricks to make your Instant Pot experience even better.
By the end of this guide, you’ll have a clear understanding of how to use the Instant Pot for a variety of recipes and cuisines. You’ll also feel more confident and comfortable with your Instant Pot, and ready to explore the endless possibilities of this amazing appliance.
What Is Instant Pot?
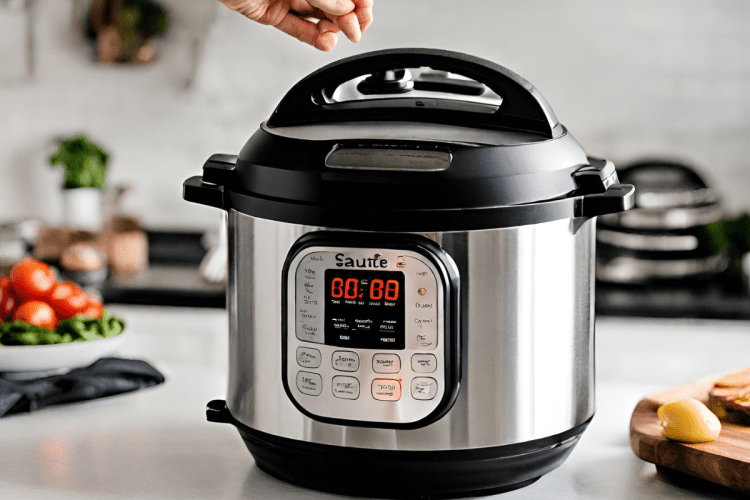
The Instant Pot is a popular and versatile kitchen appliance known for its multifunctionality. It combines several kitchen devices into one, including a pressure cooker, slow cooker, rice cooker, sauté pan, steamer, and warmer, making it a time-saving and efficient tool for cooking various dishes. The Instant Pot is designed to automate and simplify the cooking process, allowing you to prepare meals quickly and easily. It is particularly appreciated for its ability to significantly reduce cooking times, making it a favorite among busy individuals and families. With various models available, the Instant Pot offers a wide range of features, such as programmable settings, safety mechanisms, and more, to cater to different cooking needs and preferences. Whether you want to prepare soups, stews, rice, yogurt, or even desserts, the Instant Pot is a versatile kitchen companion that can help streamline your cooking routine.
How To Start The Instant Pot
Now that you have a general idea of the cooking stages, let’s see how to start the Instant Pot and get it ready for action. Here are the steps you need to follow:
Plug in the Instant Pot
Find a suitable power outlet near your countertop and plug in the Instant Pot. You’ll hear a beep and see some numbers on the display. This means the Instant Pot is on standby mode and waiting for your commands.
Check the lid and the sealing ring
Before using the Instant Pot, make sure the lid and the sealing ring are clean and properly attached. The lid should close and lock easily, and the sealing ring should fit snugly inside the lid. If the lid or the sealing ring is damaged or missing, do not use the Instant Pot until you replace them.
Check the steam release valve and the float valve
The steam release valve and the float valve are two important parts that control the pressure inside the Instant Pot. The steam release valve is the knob on top of the lid that you can turn to vent or seal. The float valve is the small metal pin next to the steam release valve that pops up and down to indicate the pressure level. Make sure both valves are clean and move freely. If they are clogged or stuck, clean them with a toothpick or a brush.
Get familiar with the control panel
The control panel is the brain of the Instant Pot. It has a large display that shows the time, temperature, and pressure settings. It also has buttons that let you choose the cooking mode, adjust the settings, and start or cancel the cooking process. You can use the buttons to select one of the smart presets, such as Soup, Rice, or Meat, or you can use the Manual or Pressure Cook button to set your own time and pressure level. You can also use the Sauté, Slow Cook, or Yogurt buttons to use the non-pressure cooking functions. To change the settings, you can use the + and – buttons to adjust the time, and the Pressure Level or Adjust button to change the pressure or temperature. To start the cooking process, you can press the Start button or wait for 10 seconds after selecting the settings. To cancel the cooking process, you can press the Cancel button or turn off the Instant Pot.
How To Use The Instant Pot: Manual Pressure Cooker Settings
If you want to have more control over the time and pressure level of your Instant Pot cooking, you can use the manual pressure cooker settings. This allows you to customize your cooking experience according to your preferences and recipes. Here’s how to use the Instant Pot with manual pressure cooker settings:
Step 1: Plug in the Instant Pot
Find a suitable power outlet near your countertop and plug in the Instant Pot. You’ll hear a beep and see some numbers on the display. This means the Instant Pot is on standby mode and waiting for your commands.
Step 2: Add Food, Seasoning and Liquid to The Pot
Make sure you have at least 1 cup (250 ml) of liquid to create enough steam and pressure. You can use water, broth, juice, wine, or any other water-based liquid. You can also add sauces, marinades, or seasonings to the liquid to enhance the flavor of your dish. However, avoid using thick liquids, such as cream, milk, or tomato paste, as they can clog the valves and prevent the pressure from releasing. If you want to use thick liquids, you can either add them after the pressure cooking is done, or dilute them with water or broth before adding them to the pot.
Step 3: Close and Lock The Lid
Make sure the lid and the sealing ring are clean and properly attached. The lid should close and lock easily, and the sealing ring should fit snugly inside the lid. If the lid or the sealing ring is damaged or missing, do not use the Instant Pot until you replace them. Also, make sure the steam release valve and the float valve are clean and move freely. If they are clogged or stuck, clean them with a toothpick or a brush.
Step 4: Select the Pressure Cook or Manual Button
Depending on the model, the Instant Pot manual setting button will either say Pressure Cook or Manual. This is the setting you’re likely to use the most. The temperature, pressure level and cooking times can be adjusted on the control panel. Turn the Instant Pot on.
Step 5: Adjust the Time and Pressure Level
Use the + and – buttons to adjust the time according to your recipe. The time will be displayed in minutes. You can also use the Pressure Level or Adjust button to change the pressure level from High to Low, or vice versa. The pressure level will be indicated by a light on the control panel. High pressure is suitable for most foods, such as meat, beans, and grains. Low pressure is suitable for delicate foods, such as eggs, fish, and vegetables.
Step 6: Start the Cooking Process
You can either press the Start button or wait for 10 seconds after selecting the settings. The Instant Pot will beep and the display will show “On”. This means the Instant Pot is preheating and building up pressure. This stage can take anywhere from 5 to 40 minutes, depending on the amount and temperature of the liquid. Once the pressure is reached, the Instant Pot will beep again and the display will show the remaining time in minutes. This means the Instant Pot is cooking under pressure. The float valve will pop up and the lid will be locked. Do not attempt to open the lid or move the Instant Pot during this stage.
Step 7: Release The Pressure
When the cooking time is up, the Instant Pot will beep and switch to the Keep Warm mode. The display will show “L0:00” and start counting up. This means the Instant Pot is releasing the pressure. You can either use Natural Pressure Release (NPR) or Quick Release (QR) to release the pressure, depending on the recipe and the method you choose. NPR means letting the pressure drop naturally, which can take 10 to 40 minutes. During this time, the food continues to cook at a slower rate. QR means using the valve to release the pressure manually, which can take a few seconds to a few minutes. To use QR, turn the steam release valve from Sealing to Venting, using a wooden spoon or a heat-resistant glove. Be careful of the hot steam that will come out of the valve. You’ll know the pressure is released when the float valve drops and the lid is unlocked.
When to use NPR or QUICK RELEASE?
One of the critical aspects of Instant Pot cooking is understanding when to use Natural Pressure Release (NPR) and Quick Release (QR) to release the pressure. This knowledge ensures safety and optimal results for your recipes.
NPR means letting the pressure drop naturally, which can take 10 to 40 minutes. During this time, the food continues to cook at a slower rate. QR means using the valve to release the pressure manually, which can take a few seconds to a few minutes.
The choice of NPR or QR depends on the type and quantity of food you are cooking, as well as your personal preference. Here are some general guidelines to help you decide:
Use NPR when cooking meat, dried beans and legumes, rice, soup, and other foods that are mostly liquid. This allows the food to finish cooking and absorb the flavors of the liquid. It also prevents the liquid from splashing out of the valve and making a mess.
Use QR when adding additional ingredients to the pot (like with a stew), or cooking eggs, vegetables, delicate foods, or ingredients that don’t benefit from additional cook time. This prevents the food from overcooking and becoming mushy or dry.
Use a combination of NPR and QR when cooking foods that need a specific cook time, such as pasta, grains, or seafood. This means letting the pressure release naturally for a certain amount of time (usually 10 minutes), then using the valve to release the remaining pressure. This gives you more control over the doneness of your food
.To use NPR, simply do nothing after the cooking time is up. The Instant Pot will switch to the Keep Warm mode and the display will show “L0:00” and start counting up. Wait until the float valve drops and the lid is unlocked before opening the pot.
To use QR, turn the steam release valve from Sealing to Venting, using a wooden spoon or a heat-resistant glove. Be careful of the hot steam that will come out of the valve. You’ll know the pressure is released when the float valve drops and the lid is unlocked.
How To Sauté In Instant Pot
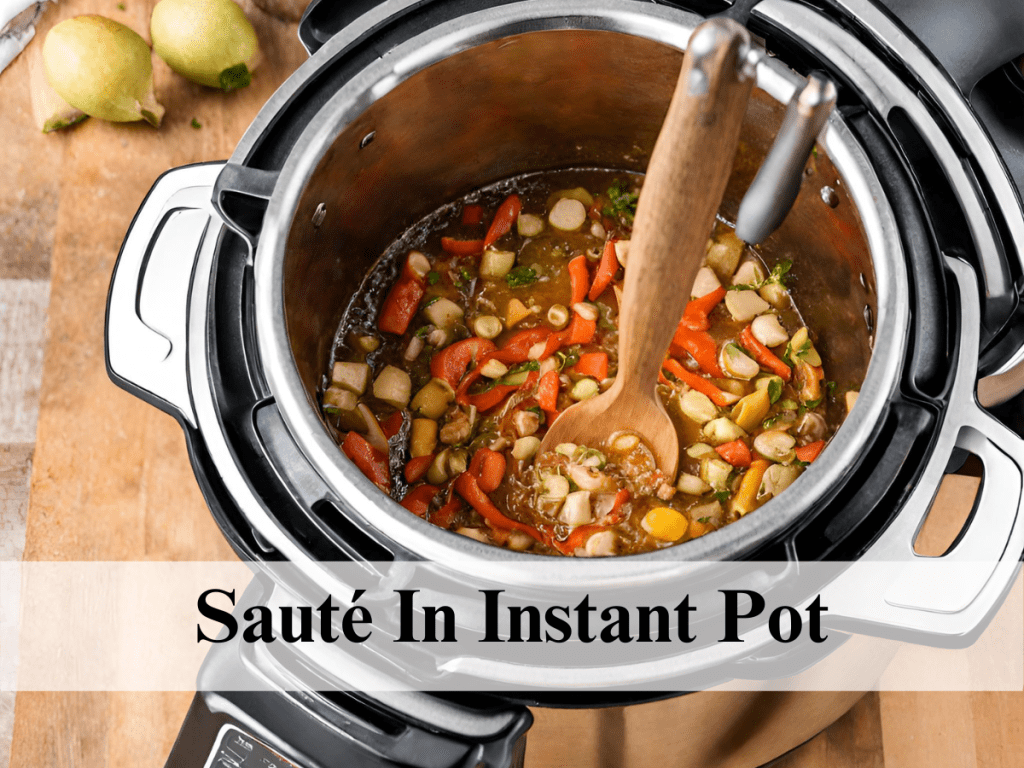
One of the great features of the Instant Pot is the sauté function, which allows you to brown, sear, or sauté your ingredients before or after pressure cooking. This can add more flavor, texture, and color to your dishes, as well as reduce the number of pots and pans you need to use.
I’ll show you how to use the sauté function on your Instant Pot, and share some tips and tricks to make the most of it.
How to use the sauté function on your Instant Pot
Using the sauté function on your Instant Pot is very simple. Here are the basic steps:
- Press the Sauté button on your Instant Pot. The display will show the default time of 30 minutes and the default temperature of Normal. You can adjust the time and temperature as needed, using the + and – buttons and the Adjust button. (See below for more details on the different temperature settings.)
- Wait for the display to say “Hot”. This means that the pot is preheated and ready for sautéing. You can also add oil or butter to the pot before it gets hot, if you prefer.
- Add your ingredients to the pot and sauté them as you would on a stovetop, stirring occasionally. You can use a wooden spoon, a silicone spatula, or a metal utensil that is safe for non-stick surfaces. Avoid using sharp or abrasive tools that can scratch the inner pot.
- Press the Cancel button to turn off the sauté function when you are done. You can then proceed with the rest of your recipe, such as adding liquid, pressure cooking, or thickening the sauce.
More Tips For Instant Pot Beginners
Now that you’ve learned the basics of using your Instant Pot, here are some more tips and hacks that will make your Instant Pot experience even more enjoyable. From cleaning advice to maximizing efficiency, these tips will help you become an Instant Pot pro in no time.
How to Clean The Sealing Ring
The sealing ring is the silicone ring that fits inside the lid and creates an airtight seal for pressure cooking. Over time, the sealing ring can absorb odors and flavors from the food you cook, which can affect the taste and smell of your dishes. To prevent this, you should clean the sealing ring regularly and replace it when it gets worn out or damaged.
To clean the sealing ring, you can either wash it by hand with warm, soapy water and a soft brush, or put it in the dishwasher on the top rack. You can also soak it in vinegar or lemon juice for a few hours to remove any stubborn odors or stains.
To replace the sealing ring, you can buy a new one from the official Instant Pot website or from other online retailers. Make sure you buy the right size and model for your Instant Pot. To install the new sealing ring, simply remove the old one from the lid and insert the new one into the groove, making sure it fits snugly and evenly.
How to Use The Pot-in-Pot Method
The pot-in-pot method is a technique that allows you to cook two or more dishes at the same time in your Instant Pot, using separate containers that fit inside the inner pot. This is useful for cooking foods that have different cooking times, temperatures, or liquid requirements, or for preventing foods from scorching or sticking to the bottom of the pot.
To use the pot-in-pot method, you need to have a trivet or a steamer basket that can hold the containers above the liquid in the inner pot. You also need to have containers that are oven-safe, pressure-safe, and fit inside the inner pot without touching the sides or the lid. You can use metal, glass, ceramic, or silicone containers, such as cake pans, ramekins, bowls, or cups.
To cook using the pot-in-pot method, follow these steps:
- Add the required amount of liquid to the inner pot, usually 1 1/2 to 2 1/2 cups, depending on the size of the cooker
- Place the trivet or the steamer basket inside the inner pot, making sure it is stable and secure
- Fill the containers with the food you want to cook, such as rice, pasta, vegetables, meat, or dessert
- Cover the containers with foil or lids, if needed, to prevent splatter or moisture loss
- Carefully lower the containers onto the trivet or the steamer basket, using tongs or oven mitts
- Close the lid and select the appropriate settings for pressure cooking, adjusting the time and pressure level as needed
- When the cooking is done, release the pressure and open the lid
- Carefully lift the containers out of the inner pot, using tongs or oven mitts
- Enjoy your delicious dishes!
How to Make Yogurt in The Instant Pot
One of the smart settings on your Instant Pot is the yogurt function, which allows you to make homemade yogurt with just two ingredients: milk and yogurt starter. Yogurt starter is simply a small amount of plain yogurt that contains live and active cultures, which are the bacteria that ferment the milk and turn it into yogurt. You can use store-bought yogurt or homemade yogurt as your starter, as long as it is fresh and unflavored.
To make yogurt in the Instant Pot, follow these steps:
- Pour a gallon of milk into the inner pot. You can use any type of milk, such as whole, low-fat, or non-dairy, but the higher the fat content, the thicker and creamier the yogurt will be
- Close the lid and select the Yogurt setting. Press the Adjust button until the display says “boil”. This will heat the milk to 180°F, which is the optimal temperature for killing any harmful bacteria and denaturing the milk proteins
- When the display says “yogt”, the milk is ready. Carefully open the lid and check the temperature of the milk with a thermometer. If it is not 180°F, close the lid and select the Sauté function to heat it up a little more, stirring occasionally
- When the milk reaches 180°F, turn off the Instant Pot and let the milk cool down to 110°F, which is the optimal temperature for adding the yogurt starter. You can either let the milk cool naturally, which can take a few hours, or speed up the process by placing the inner pot in a sink filled with cold water and ice, stirring occasionally
- When the milk cools down to 110°F, whisk in half a cup of yogurt starter, making sure it is well incorporated
- Return the inner pot to the Instant Pot and close the lid. Select the Yogurt setting again and adjust the time to 8 hours, or longer if you want a thicker and tangier yogurt
- When the time is up, the display will say “yogt” again. Your yogurt is ready! You can either enjoy it as it is, or strain it with a cheesecloth or a yogurt strainer to make it thicker and creamier, like Greek yogurt
- Store your yogurt in an airtight container in the refrigerator for up to two weeks. You can also save some of it as your starter for the next batch